Creating a KNP Guide
A KNP Guide is the container that holds all of the terms and translations relevant to a particular project, series, or subject area. Creating a guide is the first step in the KNP workflow, and guides are managed centrally through the KNP Terminology Manager so that every team member is working from the same source of truth.
Opening the KNP Terminology Manager
To open the KNP Terminology Manager, go to the Edit menu and select KNP Manager. The manager opens as a full-screen overlay. The left-hand panel lists all guides that are currently available to you or your team, and the right-hand panel displays the details and terms for whichever guide is selected.
If your account is not associated with a team, the manager will display a notice explaining that KNP Guides require a team account. You will need to join or create a team before guides can be created.
Creating a new guide
To create a new guide, click the + button in the header of the guides list on the left. Closed Caption Creator will create a new guide with a default title and immediately select it, opening the Guide Details form in the right-hand panel. From there you can edit the guide's properties before adding any terms.
Configuring guide details
The Guide Details tab contains the core metadata for the guide. The Title field is the name that will appear in the guide list and in all selection dropdowns throughout the application, so it should be descriptive and specific — for example, the name of a series or client project. The optional Description field can hold additional context that helps team members understand what the guide covers.
The Original Language field designates the primary language of the terminology in the guide. This is the language in which source terms will be written. The Languages field allows you to attach one or more additional languages to the guide, which will appear as editable columns when managing terms. To add a language, select it from the dropdown; existing languages display as removable badge chips. Removing a language from the guide does not delete any stored translations, but those translations will no longer be visible or editable until the language is re-added.
Once you have filled in the details, click Save Changes to persist the guide to your team's account. The Save Changes button remains disabled until a field has been modified, so it will only become active after you have made an edit.
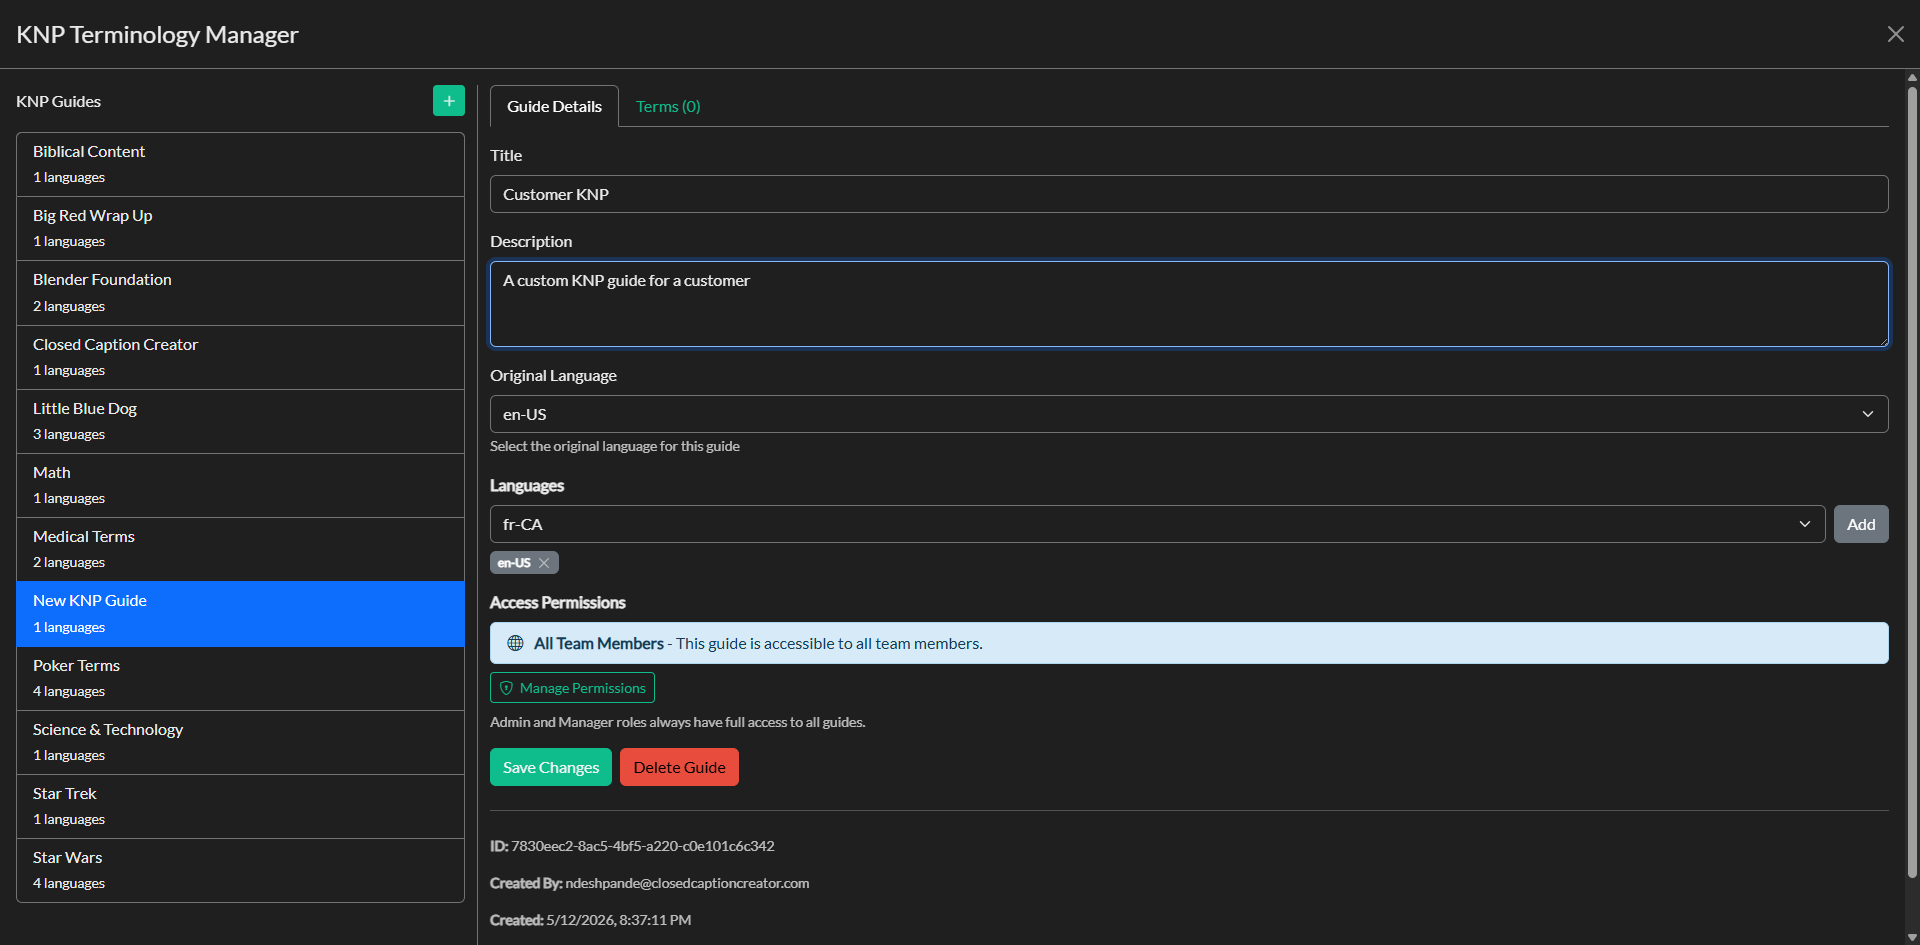
Managing access permissions
By default, a new guide with no groups assigned is accessible to all members of the team. If you need to restrict a guide to a specific subset of your team — for example, to a production group or a language-specific team — you can assign one or more groups using the permissions system.
The Access Permissions section in Guide Details shows the current permission state: either an informational message indicating that all team members have access, or a warning badge indicating that the guide is restricted to a specific number of groups. Admin and Manager roles always have full access to all guides regardless of group assignments, which ensures that supervisors can always review and edit any guide.
To change permissions, click the Manage Permissions button. This option is only visible to users with an Admin or Manager role. A dialog will appear listing all groups in your team with checkboxes. Selecting one or more groups restricts the guide to members of those groups. Clearing all checkboxes returns the guide to its default state of being accessible to everyone. Click Save Permissions to apply the changes.
Team members without an Admin or Manager role will see a note in the Access Permissions section directing them to contact their admin if permissions need to be adjusted.
Reviewing guide metadata
At the bottom of the Guide Details tab, a read-only metadata panel displays the internal ID of the guide, the email address of the team member who created it, and the timestamps for when the guide was created and last updated. This information is useful for auditing purposes and for confirming that you are viewing the correct version of a guide.
Deleting a guide
To delete a guide, click the Delete Guide button at the bottom of the Guide Details form. A confirmation dialog will appear. Confirming the deletion will permanently remove the guide and all of its terms in a single operation. This action cannot be undone, so ensure that the terms are no longer needed before proceeding.