Managing KNP Terms
Once a KNP Guide has been created and configured, the next step is to populate it with the specific terms that your team needs to track. Terms are managed through the Terms tab inside the KNP Terminology Manager, and they can also be viewed and edited directly from the KNP Terminology Lookup panel without leaving the captioning editor.
The Terms tab
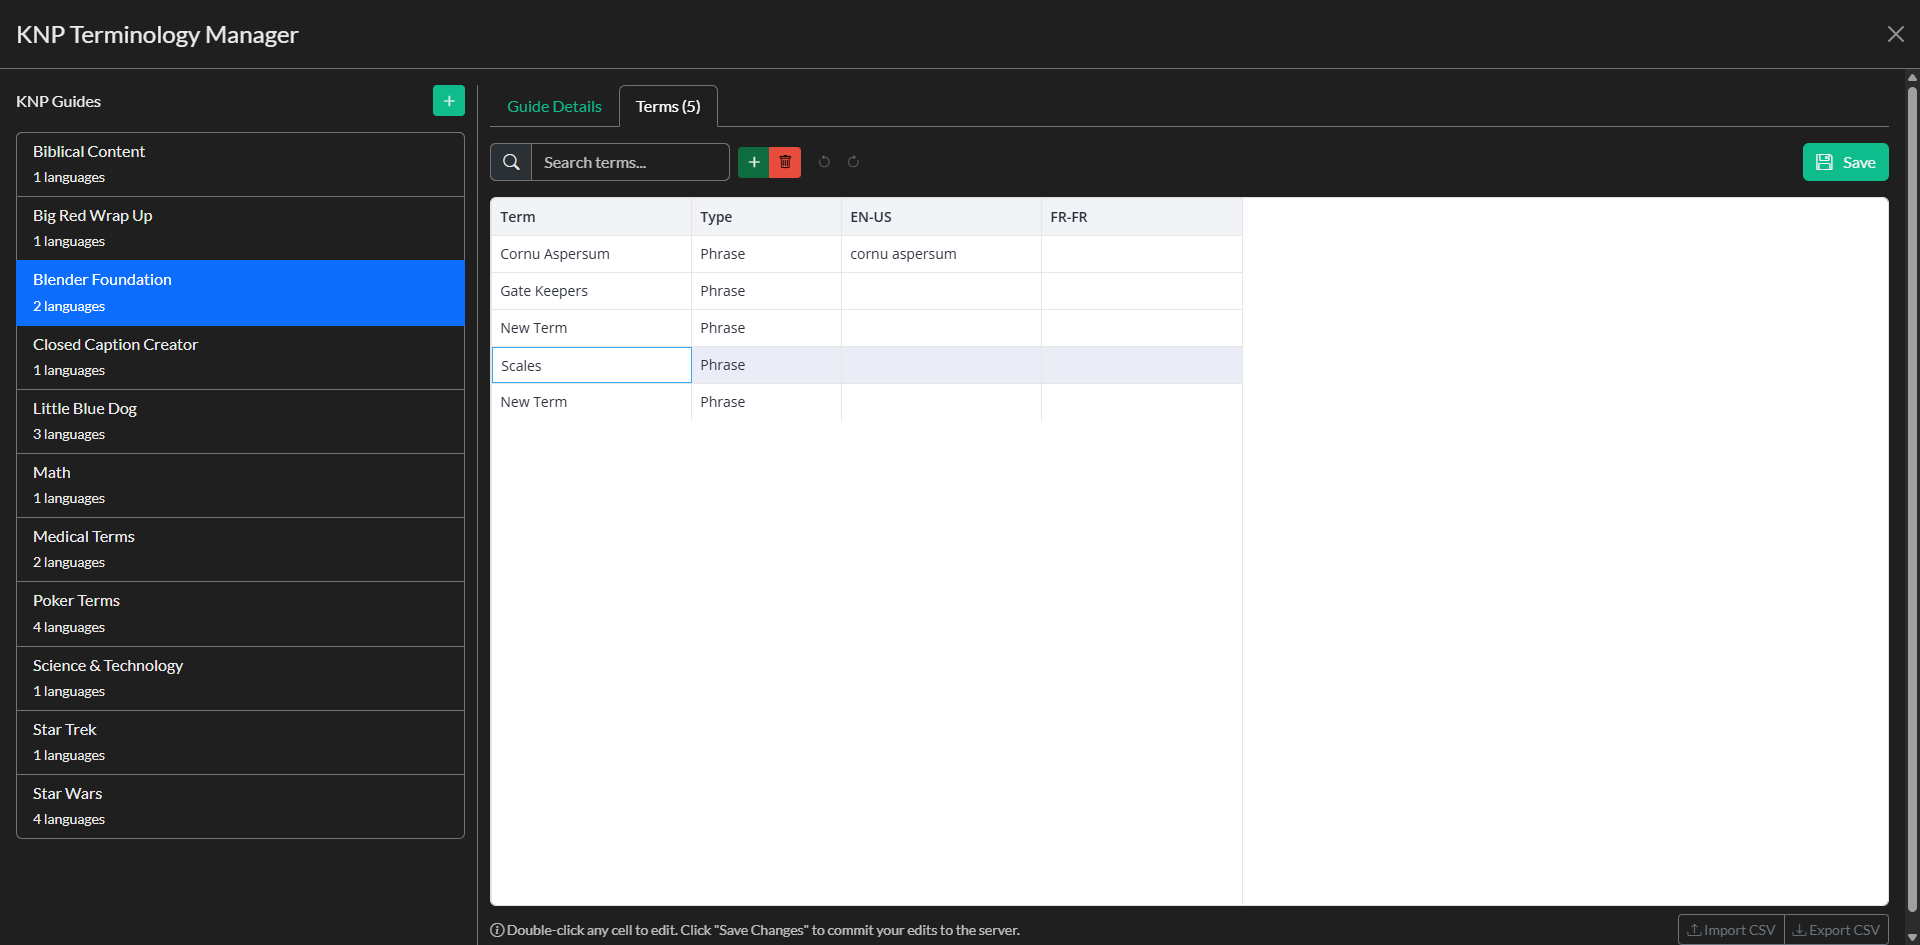
To access the terms for a guide, open the KNP Terminology Manager from the Edit menu, select a guide from the left-hand panel, and click the Terms tab at the top of the right-hand panel. The tab label displays the current term count in parentheses so you can quickly gauge how many entries the guide contains.
Terms are displayed in an interactive datagrid. Each row represents one term and has three kinds of columns: the Term column contains the canonical text of the entry, the Type column categorises the entry, and any additional columns represent the target languages attached to the guide. These language columns are generated dynamically based on the languages you configured in the Guide Details tab, so the grid automatically reflects the scope of the guide.
Term types
Every term is assigned one of five categories that describe what kind of entity it represents. A Character entry covers person names, on-screen talent, and fictional characters. A Phrase entry covers recurring catchphrases, slogans, or program-specific language that appears repeatedly. A Location entry covers place names, venue names, and geographic references. An Organization entry covers company names, brands, and institutions. A Title entry covers show titles, episode titles, and references to books or films. Categorising terms consistently makes the guide easier to maintain and provides useful context for translators.
Adding and editing terms
To add a new term, click the + button in the toolbar above the datagrid. A new row will be inserted with placeholder text that you can immediately edit. To edit any cell in the grid, double-click it. The cell will switch to an inline text editor or, in the case of the Type column, a dropdown selector. You can use the search input in the toolbar to filter the visible rows by text, which is helpful when working with large guides.
Changes made in the datagrid are not saved automatically. When you have finished editing, click the Save button in the toolbar to commit all pending changes to the server in a single operation. The system will identify which rows have been added, modified, or deleted compared to the last saved state and process only the differences. A toast notification confirms how many changes were applied successfully. To discard all unsaved edits and return to the last saved state, the undo and redo controls in the toolbar allow you to step backward and forward through your editing history.
Deleting terms
To delete one or more terms, select the rows you want to remove and then click the Delete selected button in the toolbar. A confirmation dialog will appear showing how many terms will be affected. Confirming the deletion removes the terms permanently. This action cannot be reversed through undo after it has been confirmed.
CSV import and export
For situations where a large number of terms needs to be migrated from an external source — such as a spreadsheet or a glossary from a previous project — the Terms tab supports CSV import and export. The Export CSV button downloads the current terms as a CSV file with columns for the term ID, term text, type, and one column for each language attached to the guide. The Import CSV button allows you to upload a file in the same format. Each imported row must include a value in the Term column; rows that are missing a term will be skipped and reported as errors in a toast notification. Valid rows are added or updated using a batch write operation, and the grid reloads automatically once the import is complete.
Using the KNP Terminology Lookup panel
The KNP Terminology Lookup panel gives you access to guide terms without needing to open the full KNP Manager modal. It is available as a side panel that slides in from the right edge of the application window, accessible from the icon in the main toolbar. This makes it practical for translators and captioners who need to check or update terminology while actively working on a caption file.
When you open the Lookup panel, you will see a guide selector dropdown that lists all guides you have permission to access. Selecting a guide loads its terms into a datagrid with the same column structure and editing capabilities as the Terms tab in the Manager. You can search, add, edit, delete, undo, redo, and save from the Lookup panel in the same way.
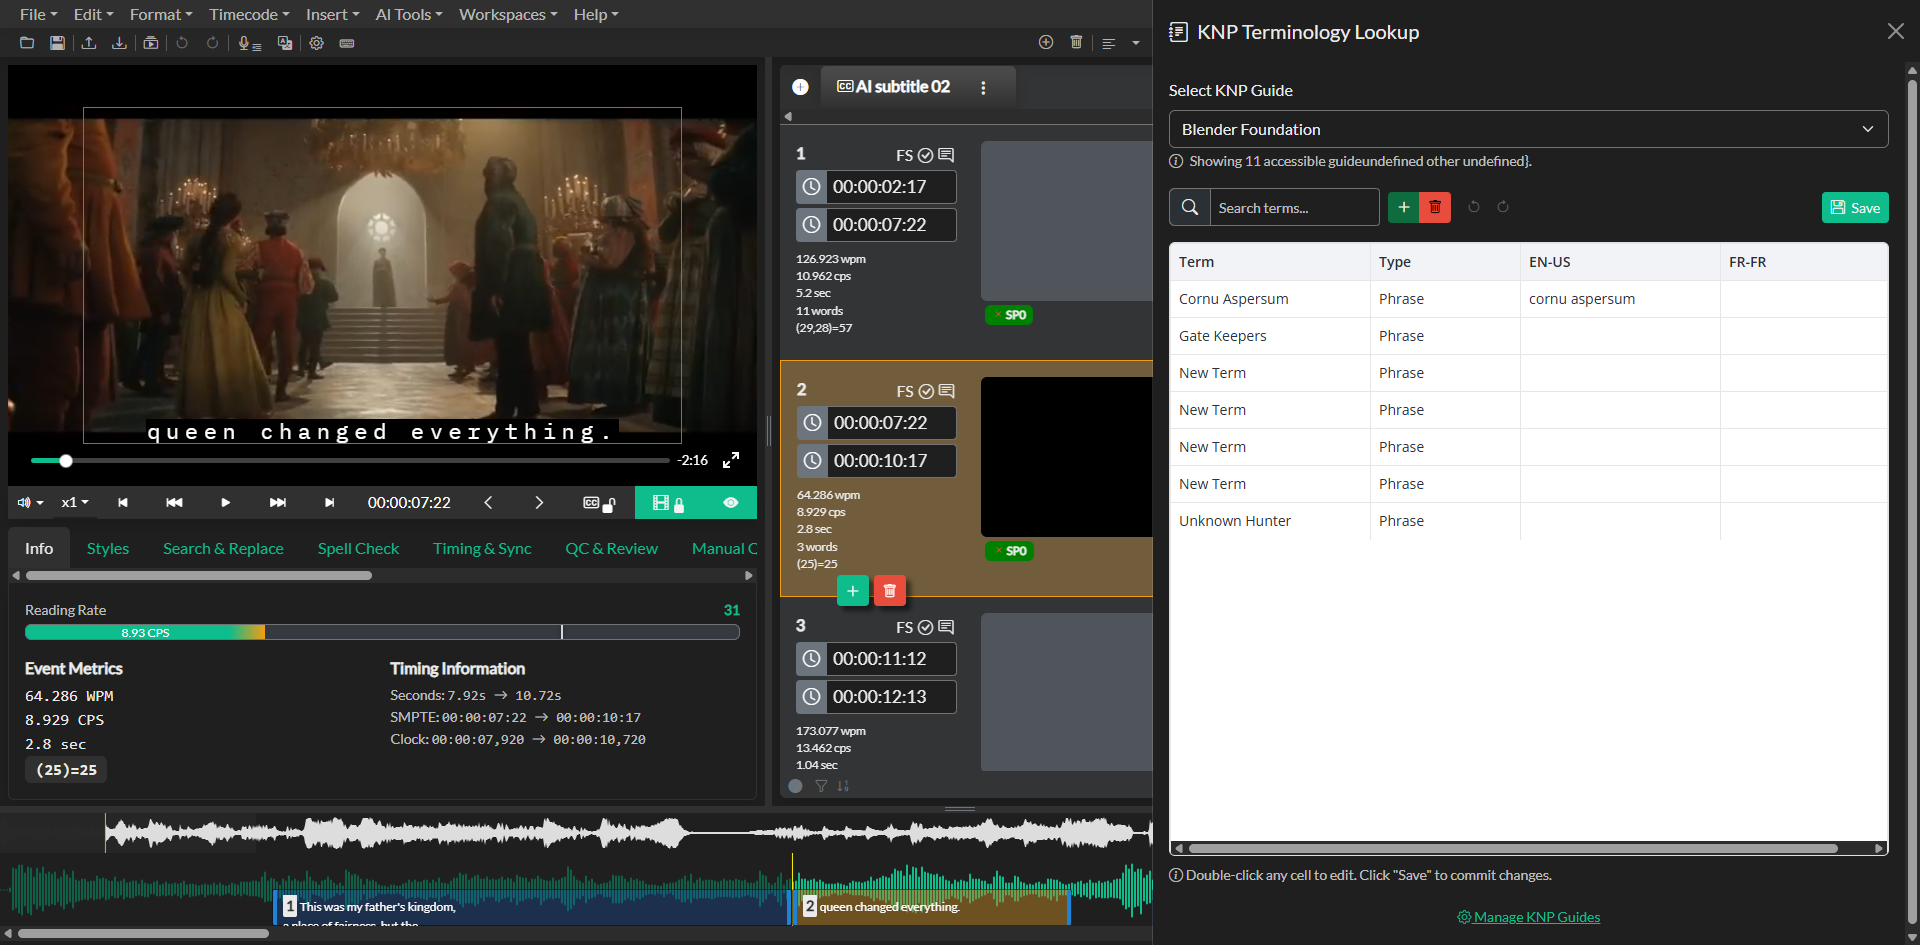
The panel can be resized by clicking and dragging its left edge. The width is adjustable between 25% and 100% of the viewport, defaulting to 40% so that it sits alongside the editor without covering it entirely. If no guides are available, the panel displays a link to open the KNP Manager where a guide can be created.
Changes saved in the Lookup panel are always written directly to the same guide data that the KNP Manager uses, so any edits made during a session are immediately available to other team members who reload their guides.